New HDB BTO Key Collection Checklist for Homeowners

Collecting BTO keys feels like the finish line, but it is really the first day of a new set of tasks. The appointment itself may be short. The decisions around it are not. A missed document, unpaid fee, or rushed first inspection can delay your move-in or create repair headaches later.
This guide walks through what to prepare before key collection, what to check during the appointment, and what to look out for when stepping into your new HDB flat for the first time.
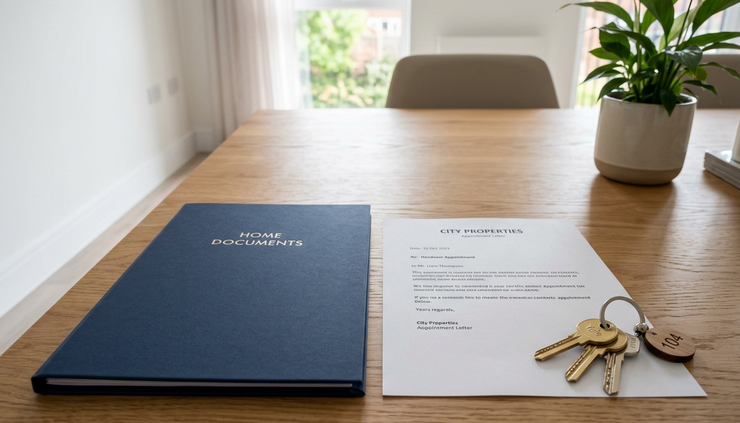
Before key collection, check that the paperwork is complete
The most common key collection stress comes from admin. HDB will usually state what to bring in the appointment notice, so read it carefully and do not rely on memory from friends or online posts. Requirements can vary based on your purchase, financing, and ownership setup.
Create one folder, digital or physical, for everything related to the flat. Keep screenshots only as backup. For important items, bring the proper document or the version requested by HDB.
Item to prepare | Why it matters |
NRICs or valid identification | HDB needs to verify the flat owners before completing handover. |
Appointment letter or notice | It confirms the date, time, and any specific instructions. |
Singpass access | Some steps may require login or digital confirmation. |
Marriage certificate, if relevant | Required for flats bought under certain eligibility schemes. |
Power of attorney documents, if relevant | Needed when an owner cannot attend and has authorised another person. |
Payment proof or required payment mode | Helps avoid delays if fees are due at collection. |
Loan-related documents | HDB or bank loan details must be settled before completion. |
Fire insurance proof, if applicable | Usually required when taking an HDB housing loan. |
If the flat has more than one owner, check whether all owners must be present. Do not assume one person can collect the keys on behalf of everyone. If someone cannot attend, arrange the required authorisation early.
Settle money matters before the appointment day
Key collection is tied to the legal completion of the flat purchase. That means money matters need to be ready before you arrive.
Depending on your situation, this may include:
Balance downpayment
Stamp duty
Legal fees
Survey fees or other conveyancing-related charges
CPF usage approvals
Housing loan arrangements
Fire insurance, if required
Service and conservancy charges
Initial utility setup costs
Do not wait until the night before the appointment to check your CPF or loan status. If you are using CPF savings, make sure the approvals are in place. If you are taking a bank loan, keep in touch with your bank and law firm so completion does not stall.
For HDB loans, fire insurance is commonly required because it protects the building structure. It does not cover renovation works, furniture, appliances, or personal belongings. If you want wider protection, you will need to look at separate home contents or renovation insurance.
Treat this as general guidance, not financial advice. Always confirm your own payment details, loan terms, and insurance requirements with HDB, CPF, your bank, or your insurer.
Bring the right people, not the whole household
Key collection is exciting, so it can feel natural to bring parents, siblings, or close friends. Keep the actual appointment simple. Bring only the people who need to be there, especially all listed flat owners.
For the first flat visit after key collection, it is useful to bring one or two practical helpers. Choose people who are patient and detail-oriented. This is not the best time for a big family tour. Too many people can distract you from checking the unit properly.
Bring these items for the first visit:
Phone with full battery
Portable charger
Measuring tape
Torchlight
Masking tape or painter’s tape
Sticky notes
Marker
Pen and notebook
Small stool, if you need help checking higher areas
Floor plan
Basic cleaning wipes
Bottled water
Avoid bringing heavy furniture, bulky deliveries, or renovation materials on the first day. You may still need to report defects, activate utilities, or arrange access with your contractor.

At the key collection appointment, verify every item handed to you
When the keys are handed over, do not just take the bundle and leave. Check what you received while you are still there or soon after, before anything gets misplaced.
You should typically receive keys for different parts of the flat, such as the main door, gate if provided, letterbox, and service yard or window-related locks where applicable. The exact set depends on your flat type and fittings.
Check the key bundle against any list provided. If there is no list, separate the keys and label them once you identify each one.
Look out for:
Number of keys received
Any access cards, tags, or mailbox keys
Door lock function
Letterbox access
Instruction manuals or warranty documents
Important notices about the flat
Information on defects reporting
Documents related to the lease or completion
Do not throw away envelopes, labels, or small plastic bags too quickly. Some key tags or markings may help you identify what each key is for.
Once you reach the flat, test the keys gently. If a lock feels stiff, do not force it. Note it down and include it in your defect list if needed.
Open the flat slowly and check safety items first
The first few minutes inside the flat should be practical. Before taking photos or planning where the sofa goes, check for safety and access issues.
Start with these areas:
Main door and gate
Open and close the main door a few times. Check whether it scrapes the floor, shuts fully, and locks smoothly. Look at the frame for dents, gaps, or alignment issues.
If there is a gate, check the hinge movement and lock. Make sure keys turn without getting stuck.
Windows and grilles
Open and close every window. Check the handles, locks, tracks, and rubber seals. Windows should move smoothly without excessive force. For safety, check that restrictors or safety features are properly fitted where present.
Do not lean hard on windows or grilles while checking. Use a visual inspection and gentle movement.
Electrical distribution board
Find the distribution board and look for the main switches. You do not need to understand every circuit immediately, but you should know where to turn power off in an emergency.
If electricity is not activated yet, plan another visit after utilities are turned on so you can test lights and sockets.
Water points
Check the kitchen, bathrooms, service yard, and any exposed pipes. Look for obvious leaks, stains, loose fittings, or strange smells. If water is not active yet, include these areas in your second inspection.

Inspect defects before renovation starts
Defect checking is one of the most important steps after key collection. Once renovation begins, it becomes harder to show that a defect came from construction rather than later work.
Set aside enough time. A proper first check can take a few hours, especially if you are inspecting with care.
Common areas to inspect include:
Floor tiles
Wall tiles
Doors and frames
Window frames
Bathroom fittings
Kitchen walls and floor
Service yard
Ceiling and wall surfaces
Electrical points
Water outlets
Drainage
Paintwork
Skirting
Household shelter door and ventilation panels
Use masking tape or sticky notes to mark defects clearly. Take photos from two distances. First, take a close-up. Then take a wider shot showing where the issue is located.
For each defect, record:
Room or area
Exact location
Short description
Photo number or file name
Date found
Good defect descriptions are simple. Write “cracked tile near bathroom entrance” instead of “bad workmanship”. Write “paint peeling above bedroom window” instead of “wall issue”.
Avoid hacking, drilling, built-in carpentry, or major renovation work before the defect process is completed for the affected areas. If you need to start renovation urgently, speak to your contractor and keep clear photo records before any work begins.
Test utilities after activation
Some checks can only happen after your utilities are active. Set up your utilities through the relevant provider and confirm when electricity and water will be available.
Once activated, test the flat again.
For electricity, check:
Light switches
Power sockets
Doorbell, if provided
Bathroom ventilation fan, if fitted
Water heater point
Air-con isolator points, if applicable
Bring a simple socket tester if you know how to use one safely, or ask your renovation contractor to help. Do not open electrical panels or attempt repairs yourself.
For water, check:
Basin taps
Shower mixers
Toilet flushes
Kitchen tap
Service yard tap
Floor traps
Water pressure
Leaks under sinks or around fittings
Let water run briefly at each point and observe drainage. Slow drainage, gurgling sounds, or water pooling may need attention.
Measure before buying anything large
A new flat can look bigger when empty. That can lead to oversized furniture, appliances that block walkways, or curtains that do not fit.
Before ordering major items, measure:
Main door width and height
Lift access and corridor clearance
Bedroom door openings
Kitchen appliance spaces
Washing machine area
Fridge space
Window sizes
Ceiling height
Bathroom clearances
Distance between power points and planned furniture
Do not rely only on the floor plan. Actual site conditions, skirting, pipes, switches, and window handles can affect fit.
This matters most for:
Fridge
Washing machine
Bed frame
Wardrobe
Sofa
Dining table
Study desk
Curtains and blinds
Built-in carpentry
Air-con trunking
If you are engaging an interior designer or contractor, arrange a site visit after key collection. They should verify measurements on-site before producing final drawings or ordering materials.
Plan renovation rules before work starts
HDB flats come with renovation rules. Some works need approval, and some works are not allowed. Your contractor should know the rules, but you should still understand the basics.
Before renovation begins, check:
Whether your contractor is registered with HDB for the type of work
Whether renovation permits are required
Approved working hours
Restrictions on hacking walls or floors
Bathroom waterproofing rules
Air-con installation requirements
Debris disposal arrangements
Lift protection and common area care
Neighbour notice practices
Renovation is where many new homeowners rush. Slow down before confirming expensive work. Once tiles are hacked, carpentry is fabricated, or appliances are delivered, changes become costly.
If you are doing simple works only, such as loose furniture and curtains, you may still need to coordinate drilling, delivery access, and common area protection.
Watch for common key collection mistakes
Most problems come from rushing. These are the mistakes worth avoiding.
Skipping the appointment notice
Do not assume requirements are the same for every household. Read your specific instructions.
Forgetting Singpass or login access
Make sure your phone, Singpass app, and mobile number are ready before the appointment.
Not checking the key set
Label keys early. Once multiple contractors and family members start using the flat, confusion grows fast.
Starting renovation before defect checks
This can make defect claims harder. Inspect first, renovate later.
Buying appliances too early
A good sale is not useful if the fridge cannot fit through the door or the washer blocks the service yard path.
Letting too many people access the flat
Keep track of who has keys. Change locks or cylinders later if needed, especially after renovation is complete.
Forgetting the letterbox
Test the letterbox key. Important notices, bills, and estate information may arrive there.

Use this quick checklist on the day itself
Save this section before your appointment or screenshot it for easy reference.
Before leaving home, check that you have:
NRICs or valid IDs
Appointment notice
Singpass access
Required documents from HDB
Loan and insurance documents, if applicable
Payment confirmation or approved payment method
Phone and charger
Folder for all flat documents
At the appointment, confirm:
Completion steps are done
Payments are settled
Key set is received
Any access items are received
Documents and notices are understood
Defect reporting process is clear
At the flat, check:
Main door and lock
Gate, if any
Windows and handles
Letterbox
Walls and ceilings
Floor and wall tiles
Bathrooms
Kitchen and service yard
Household shelter
Electrical points after utilities are active
Water points after utilities are active
Before renovation, confirm:
Defects are reported
Photos are saved
Contractor measurements are done
Renovation rules are checked
Permits are submitted where needed
Neighbours and common areas are considered
Access and spare keys are controlled
The real goal is a smooth handover, not a perfect first day
Key collection is emotional. It marks the start of a home that may have taken years of waiting. Enjoy that moment, but give yourself space to handle the practical side well.
The best approach is simple. Prepare your documents, check your payments, inspect the unit before renovation, and record everything clearly. A careful first week can save weeks of stress later.
Your BTO does not need to be fully planned on day one. It only needs to be properly handed over, properly checked, and ready for the next step.


Comments